Creating Capacity Rules
You can create capacity rules to define the types of work that an agent can receive, and the volume from each of those types that would fully allocate the agent. Once an agent becomes fully allocated, they will not receive any more work offers until their allocation status changes to either partially allocated or not allocated.

|
You can create multiple conditions as needed within a capacity rule to achieve your desired rule settings. The conditions work together and need to be compatible. Avoid creating conflicting conditions that provide different maximum volumes for same channel types. |
To create a new capacity rule:
- Go to User Management > Capacity Rules.
- Click Create.
The Capacity Rule details panel appears. - Enter a Name for this capacity rule.
- Click Submit.
- Click the + symbol next to Published Versions.
A sample capacity rule is displayed that includes voice, and a maximum of four emails and/or messages. - Enter a Name for this version of the capacity rule.
- Select the Rule Type for this capacity rule. This defines whether the agent is fully allocated if any condition is met or only if all of the conditions are met, or if each channel is assigned a percentage of the agent's total capacity.
- If your channel supports voice calls, leave the Any/All rule Voice statement as it is. This tells the capacity rule that 1 call equals 100% capacity. If this is a Percentage rule, you can reduce the percentage value of a voice call so that it can be offered while digital channel interactions are being handled provided their total percentage doesn't exceed 100%. You cannot change the Max number for Voice to be anything other than 1.
- If necessary, clear out the condition box by clicking the x on Any/All channel labels.
- Drag and drop any channel types that you want to be considered in this capacity rule condition into the outlined box.
If you have cleared out the condition box, it disappears. You can create a new one by dropping any channel type into the empty area.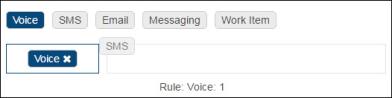
- Enter the maximum number of work offers, from any combination of the channels included in the condition, that an agent can handle at one time.
- To create an additional condition, drag and drop a channel label onto an empty area around the existing conditions.
- Repeat steps 9 to 11 for each condition that you want to add to this capacity rule.
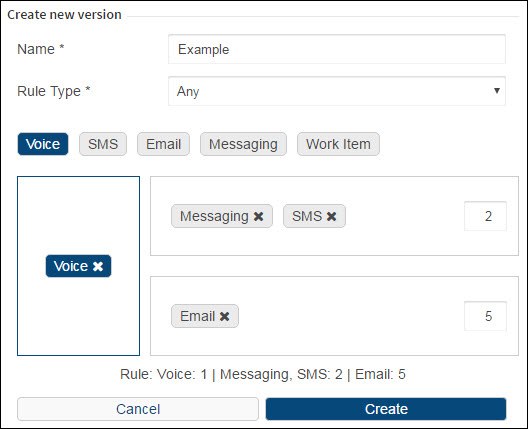
A text description of the complete capacity rule statement is displayed under the condition boxes.  Example
In this example, a capacity rule is being created that has the following conditions:
- One voice call at a time, or
- A maximum of two SMS and/or messages at one time, or
- A maximum of five emails at one time
- When you're done adding your conditions, click Create.
This rule become a published version. - Click the toggle next to the rule's name to enable it.
Now that you have a capacity rule enabled, you can assign it to users.
